Using the Checkit
Each Pipette Checkit® has three precision glass capillaries matched to the top, middle, and low end of the range of your pipette. Pipet the three diagnostic volumes into the matching sample wells, flip the wells into measurement position, and take your readings. The pipetted volumes are compared to easy-to-read graduations that tell you instantly whether the pipette needs adjustment.
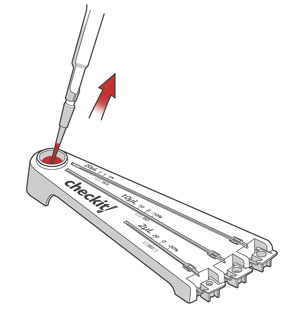
Step 1: Draw dye into the pipette tip.
Place the Checkit on a level surface. Grasp the pull tab on the reservoir seal and peel it off to expose the measurement fluid. Fit your pipette with an appropriate pipette tip (not a filter or gel-loading tip). Set your pipette volume. Then draw the dye (measurement fluid) from the reservoir into the tip.
Step 2: Dispense dye into a well.
Pipet the liquid into the first well of the Checkit.

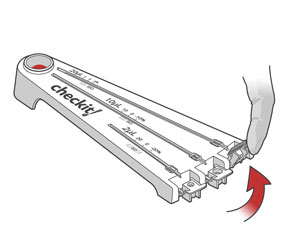
Step 3: Flip up the well tab.
Use your finger tip to rotate the well to the vertical position. The droplet will automatically be drawn into the measurement capillary.
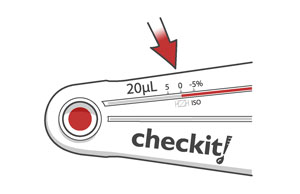
Step 4: Checkit!
Use the scale printed on the Checkit cartridge to determine the actual dispensed volume. Then repeat for the middle (50% of largest volume) and bottom (10% of largest volume) of the range of your pipette.